


Soldering LED Wires and Making Splice Connections with RibbonFlex LED Tape Light
LED strip lights from Armacost Lighting are a versatile solution for undercabinet lighting and indoor or outdoor accent lighting. We have a wide variety of solderless LED tape light connectors for easy and convenient tape lighting installations. However, if direct soldering is preferred or required, follow the recommended steps below to create extra reliable electrical connections.
View or download Soldering LED Tape Light Instructional PDF to print a copy of these recommendations.
Safety Tips:
Soldering irons get extremely hot, operate with caution.
Never put a hot soldering iron down on a workbench.
Make sure your work area is clean, dry, and free from grease.
Always work in a well-ventilated area.
Choose the Right Soldering Tools
We recommend using a soldering iron with a fine point conical soldering tip. Use thin rosin-core solder. For example, 60/40 0.032 in. light duty.

Tip: Use a wet sponge to remove excess solder and to keep the tip clean. Soldering stations are also useful and readily available online.

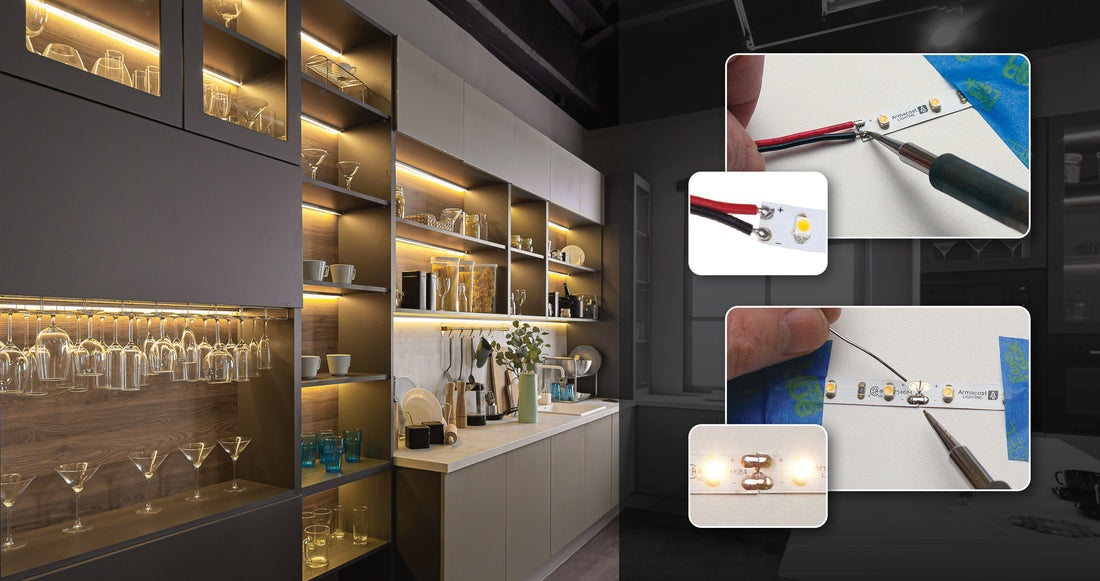
How to Solder LED Power Wires to LED Strips
When soldering power wires to the copper pads on LED tape, first prepare the wire by “tinning” the stripped ends of each wire lead. Place the tip of the hot soldering iron against the wire and apply a light, even coat of solder as shown.

The same basic tinning process is also required on each of the copper pads on the LED tape light. Use painter’s tape to secure the LED tape when you are soldering.

Once the wire leads and copper pads are tinned, join the wires to the copper pads and solder using a clean soldering tip. No extra solder is required since the tinning has been done. Be sure to maintain correct polarity (+ to +, - to -, R to R, G to G, etc.).

Tip: Adding a heat shrink tube to seal new wire lead connections creates a more professional appearance.

How to Solder Tape to Tape Sections of LED Lighting
Longer lengths of LED tape light are made by soldering together ½ meter sections of tape lighting. It’s easy to splice two sections of LED tape together for your large installations.
First, join two sections of tape light together on a flat surface as shown below. Make sure to maintain polarity with the tape lighting. Secure the LED tape in place with painter’s tape.

Next, tin each section of the copper pads with a small “mound” of solder. Then, with the tip of your hot soldering iron, drag one solder mound to the adjoining mound to form a single, continuous larger oval solder mound.
Repeat for each copper pad connection. Done properly, the soldered splice connection will be as strong, and last as long, as any factory-made connection.

Be sure to power up your LED lighting prior to final installation. Ensure that all tape light sections are lighting properly and connections are solid.
